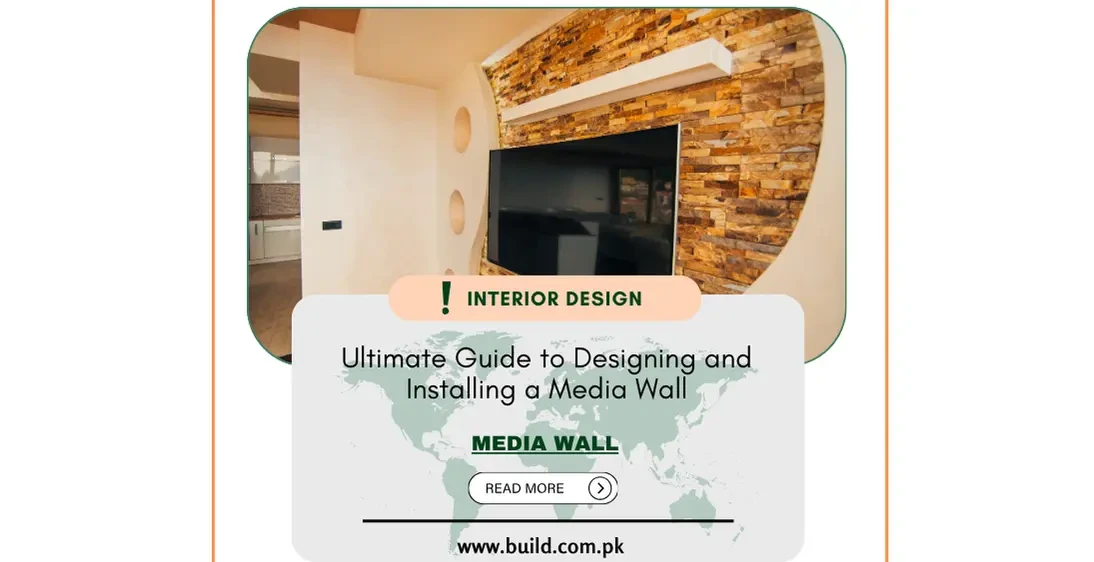
Ultimate Guide to Designing and Installing a Media Wall
Introduction:
In
today's digital age, a media wall has become a central feature in many homes,
transforming living spaces into entertainment hubs. A media wall not only
provides a stylish focal point but also offers practical benefits by organizing
and concealing cables and devices. This comprehensive guide explores the
benefits, design considerations, types, installation process, and maintenance
tips for creating the perfect media wall for your home.
Benefits of a Media Wall
Aesthetic Appeal:
A
media wall enhances the visual appeal of your living space by providing a
clean, organized, and modern look. It allows you to integrate your television,
sound system, and other media devices seamlessly into the room's design.
Space Optimization:
A
media wall helps maximize your living space by eliminating the need for bulky
furniture and stands. It provides a sleek and efficient solution for housing
all your entertainment equipment in one place.
Cable Management:
One
of the biggest advantages of a media wall is the ability to conceal cables and
wires, creating a clutter-free environment. This not only improves the
aesthetics but also enhances safety by reducing trip hazards.
Customization:
Media
walls offer endless customization possibilities. You can choose from various
materials, finishes, and layouts to match your personal style and the overall
décor of your home. Additionally, you can incorporate shelves, cabinets, and
lighting to enhance functionality and design.
Improved Viewing Experience:
A
well-designed media wall can enhance your viewing experience by providing
optimal TV placement and minimizing glare and reflections. It allows you to
create a comfortable and immersive entertainment space.
Design Considerations
Room Layout:
Consider
the layout of your room and the available wall space when planning your media
wall. Ensure that the placement of the TV and other devices allows for
comfortable viewing from different seating positions.
TV Size and Placement:
Choose
the right size of TV for your media wall, taking into account the viewing
distance and the overall proportions of the room. The TV should be mounted at
eye level when seated to provide a comfortable viewing angle.
Material Selection:
Select
materials that complement the existing décor of your room. Popular choices
include wood, laminate, glass, and stone. Consider the durability, maintenance
requirements, and aesthetic appeal of each material.
Storage Solutions:
Incorporate
storage solutions such as shelves, cabinets, and drawers to house your media
devices, accessories, and personal items. This helps keep your living space
organized and free from clutter.
Lighting:
Integrate
lighting into your media wall design to create a visually appealing and
functional space. Use LED strips, spotlights, or recessed lighting to highlight
the TV area and provide ambient lighting.
Ventilation"
Ensure
proper ventilation for your media devices to prevent overheating. Design your
media wall with adequate airflow around the TV, sound system, and other
equipment.
Sound System Integration:
Plan
the integration of your sound system into the media wall design. Consider the
placement of speakers, soundbars, and subwoofers to achieve optimal sound
quality and coverage.
Types of Media Walls
Built-in Media Wall:
A
built-in media wall is a permanent structure integrated into the room's
architecture. It provides a seamless and cohesive look, with customized
features and finishes to match your home's design.
Freestanding Media Wall:
A
freestanding media wall is a modular and movable solution that can be placed
against any wall. It offers flexibility in design and installation and can be
easily relocated if needed.
Floating Media Wall:
A
floating media wall features a minimalist design with the TV and shelves
mounted on a wall panel, creating a floating effect. This design is ideal for
modern and contemporary interiors.
Custom Media Wall:
A
custom media wall is tailored to your specific needs and preferences. It allows
you to create a unique design with personalized features, materials, and
finishes.
Installation Process
Planning and Design:
Assess
Your Needs: Determine the equipment and storage requirements for your media
wall. Consider the size of the TV, the number of media devices, and the desired
storage solutions.
Create
a Design Plan: Sketch a design plan that includes the layout, dimensions, and
materials for your media wall. Consider the placement of the TV, shelves,
cabinets, and lighting.
Obtain
Necessary Permits: Check with local authorities to determine if any permits are
required for your media wall installation, especially for built-in designs.
Preparation:
Measure
and Mark: Measure the wall space and mark the positions for the TV, shelves,
cabinets, and other components. Ensure accurate measurements to achieve a
balanced and symmetrical design.
Prepare
the Wall: Clear the wall area and ensure it is clean, dry, and free from any
obstructions. If needed, reinforce the wall to support the weight of the TV and
other components.
Installation:
Install
the Frame: Construct the frame for the media wall using wood or metal studs.
Ensure the frame is level and securely attached to the wall.
Mount
the TV: Install the TV mount according to the manufacturer's instructions.
Ensure the mount is securely attached to the frame and positioned at the
desired height.
Install
Shelves and Cabinets: Attach shelves, cabinets, and other storage solutions to
the frame. Use appropriate fasteners and brackets to ensure stability and
support.
Run
Cables and Wires: Conceal cables and wires within the frame or use cable
management solutions to keep them organized and hidden. Ensure proper
connections for all media devices.
Install
Lighting: Integrate lighting fixtures into the media wall design. Connect the
lighting to the power source and test to ensure proper operation.
Finishing Touches:
Apply
Finishes: Apply paint, stain, or other finishes to the media wall components to
achieve the desired look. Ensure even coverage and allow sufficient drying
time.
Install
Decorative Elements: Add decorative elements such as trim, molding, and artwork
to enhance the aesthetics of the media wall.
Test
and Adjust: Test all components of the media wall, including the TV, sound
system, and lighting. Make any necessary adjustments to ensure optimal
performance and appearance.
Conclusion:
A media wall is a versatile and stylish addition to any home, offering numerous benefits in terms of aesthetics, functionality, and organization. By carefully considering the design, materials, and installation process, you can create a media wall that enhances your living space and provides a seamless entertainment experience. Whether you opt for a built-in, freestanding, or custom design, a well-executed media wall will become a focal point in your home, delivering both visual appeal and practical value for years to come.
Recent Posts

Hisense Inverter AC: Smart, Efficient Choice for Cool Living

Midea Pakistan: Redefining Home Comfort with Innovation